It’s a good practice to create a backup of your iPhone in iTunes in case you accidentally delete your iPhone data. One important problem with iTunes backup is that it’s not encrypted by default. If you create a local backup stored on a computer, your backup could be accessed by anyone who has physical access to your computer. To prevent data leakage or data loss, I would recommend you encrypt your iTunes backup with a password.
How to Encrypt Your iTunes Backup with Password?
- Connect your iPhone to a computer (or Mac) with iTunes installed. Launch iTunes and then click on the little iPhone icon in the upper toolbar. This takes you to the Summary page.
![iphone-icon]()
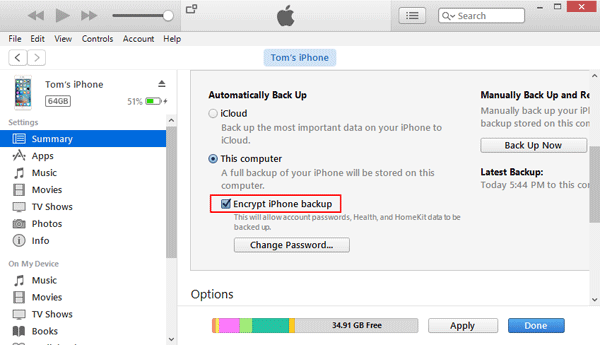
- Under the Summary page, you will see a section called Backups. Check This computer and also check Encrypt iPhone backup checkbox.
![encrypt-itunes-backup]()
- You will be asked to create a password that will used to encrypt your iTunes backup. Make sure you set a good password you won’t forget.
![set-itunes-backup-password]()
If you’re running Mac OS X, there is an additional option lets you save the password in Keychain access, and I don’t suggest you ticking that option.
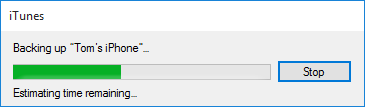
- Once you clicked the Set Password button, iTunes will encrypt all your local backup immediately.
![backing-up-iphone]()
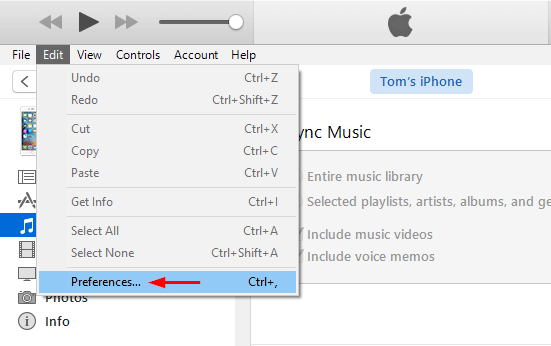
- When it’s done, you can verify that your backup is encrypted. Within iTunes, click the Edit menu and select Preferences.
![itunes-preferences]()
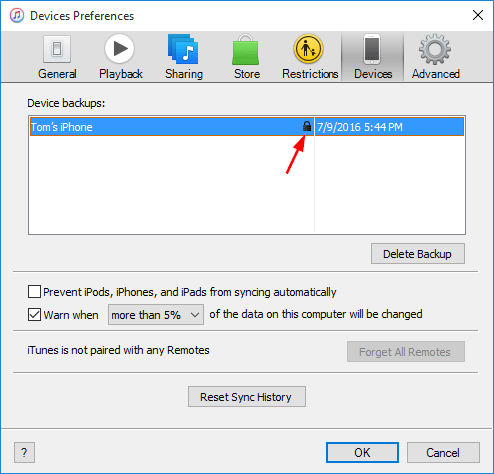
- Once the Preferences window opens, click the Devices tab. If you spot a tiny lock icon in the row of your latest backup, it indicates your iTunes backup is encrypted successfully.
![itunes-encrypted-backup]()

After encrypting your iTunes backup with a password, nobody can restore a device from the backup without knowing your password. The data in the backup is encrypted too, and no need to worry about data leak even when your computer is stolen.